

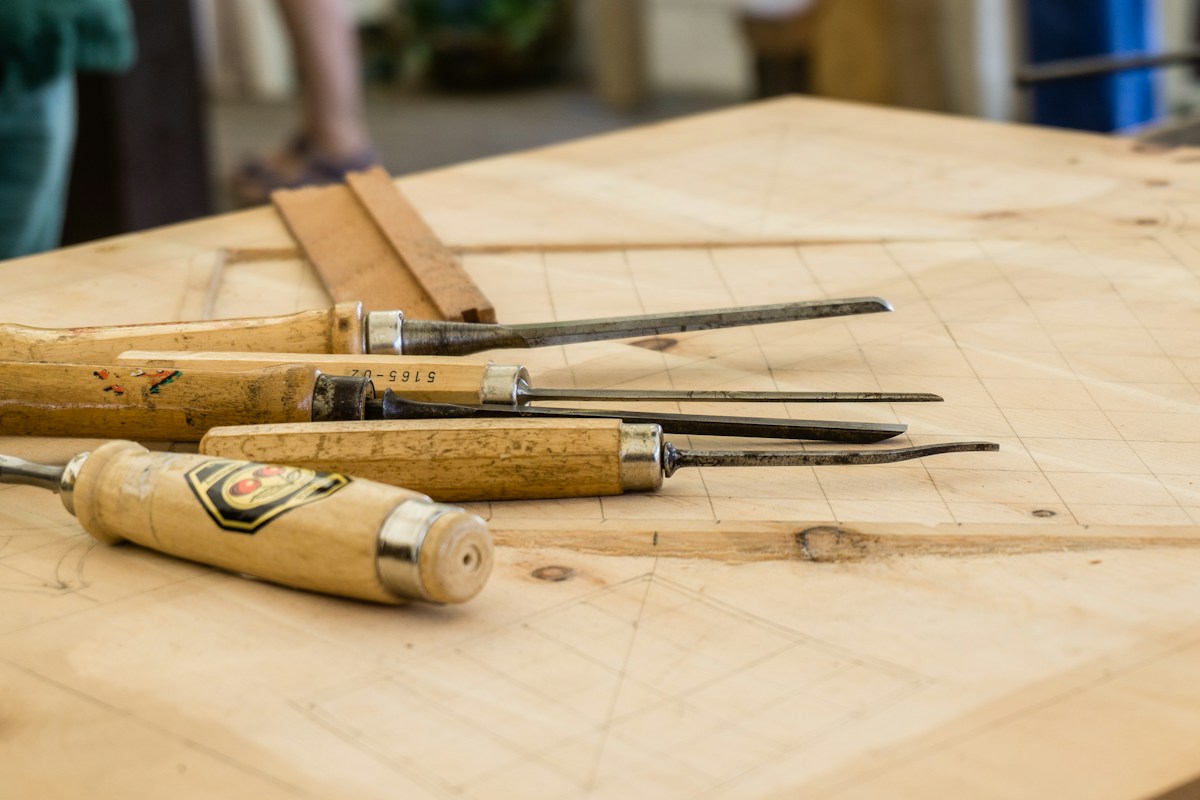
Open a heavy, hand-planed walnut drawer from an eighteenth-century Queen Anne highboy or an early American Chippendale bureau, pull it completely out of its carcass, and turn it upside down in bright natural raking light. Run your fingertips across the exposed joint where the solid chestnut drawer side meets the carved drawer face. If your fingers encounter slight, irregular variations in the width of the wooden pins, tiny knife-scored layout lines slicing across the grain, and the subtle trace of a hand-chiseled baseline that no modern computer router could ever mimic, you are not merely inspecting antique furniture; you are reading the physical, tactile handwriting of a long-departed master cabinetmaker.
That structural honesty is the enduring magic of traditional antique furniture joinery. Long before synthetic chemical glues, motorized CNC routers, pneumatic staple guns, and flat-pack particle board transformed commercial furniture into disposable, short-lived consumer goods, woodworking was an intimate dialogue between human anatomy, mechanical geometry, and the living physics of organic timber. Cabinetmakers knew that wood is not a static plastic; it is a breathing, hygroscopic organic material that expands across its width in summer humidity and contracts in winter dryness. To build furniture that would endure across centuries, artisans developed a sophisticated repertoire of interlocking mechanical joints: through mortise-and-tenons, drawbored wooden pegs, hand-cut dovetails, butterfly keys, and sliding dados.
In this authoritative historical, structural, and connoisseurial manual, we explore the identification and preservation of antique furniture joinery across four centuries of craftsmanship. We deconstruct the physics of timber movement and grain orientation, trace the stylistic evolution from William and Mary and Georgian to Federal and Arts & Crafts, analyze the telltale physical signatures separating authentic hand-cut joints from nineteenth-century factory machinery, and provide collectors with practical methodologies to authenticate, conserve, and evaluate genuine period furniture.
1. The Physics of Timber: Anisotropic Expansion and Moisture Equilibrium
To understand why traditional furniture joinery evolved into such intricate, interlocking geometric structures, one must first master the fundamental physical science of wood: anisotropic dimensional movement.
Wood is not an isotropic substance like metal or molded plastic, which expands symmetrically in all directions under heat. Wood is composed of hollow, parallel cellulose fibers bonded together by lignin, designed by nature to transport water vertically from tree roots to leaves. Because of this cellular orientation, wood responds to ambient relative humidity in an anisotropic manner: it expands and contracts dramatically tangentially and radially across its grain (across the width of a board), while experiencing virtually zero dimensional movement along its longitudinal grain (along the length of the board).
A twenty-inch-wide solid quarter-sawn oak tabletop can expand and contract by as much as a quarter of an inch between a humid July summer and a dry, heated January interior. If an eighteenth-century cabinetmaker had glued or rigidly nailed that tabletop firmly across a perpendicular frame, the timber would inevitably split down the middle with the explosive force of a rifle shot. Every traditional joint-from breadboard ends with slotted peg holes to floating mortise-and-tenons-was engineered specifically to allow timber to breathe, expand, and contract freely across the seasons without ripping itself apart.
2. The Ancient Mortise and Tenon: The Indestructible Structural Skeleton
Dating back more than four thousand years to ancient Egyptian royal furniture, Persian shipbuilding, and Neolithic timber halls, the mortise and tenon joint is the undisputed structural king of traditional architectural woodworking.
The joint is deceptively simple in concept, yet demands exacting craft precision:
- The Tenon: A projecting rectangular tongue carved into the end of a wooden rail or stretcher, shaped with a hand saw and shoulder plane.
- The Mortise: A corresponding rectangular pocket or cavity chopped into the receiving post or stile using specialized heavy mortise chisels and a wooden mallet.
When the tenon is driven into the mortise, the broad, flat face of the tenon (the cheeks) contacts the inside walls of the mortise with maximum surface contact along the long-grain fibers. Because long-grain-to-long-grain glue bonds are chemically exceptionally strong, a well-fitted mortise and tenon creates a permanent, rigid right-angle frame capable of withstanding hundreds of pounds of racking torque and lateral stress.
Master cabinetmakers refined this structure through specialized variations: the haunched mortise and tenon, which incorporates a small stepped shoulder that prevents the door rail from twisting while filling the panel groove at the corner; and the through-tenon wedged with contrasting hardwood, where the tenon passes completely through the stile and is permanently locked from the outside with driven ebony or walnut wedges, turning structural joinery into a triumphant decorative motif.
3. The Drawbored Tenon: Mechanical Clamping with Wooden Trunnels
In the sixteenth, seventeenth, and early eighteenth centuries, before reliable chemical glues were readily available or affordable in frontier workshops, cabinetmakers and timber framers relied on a brilliant mechanical locking technique: the drawbored mortise and tenon.
To execute a drawbore, the craftsman dry-fits the tenon inside the mortise. A hole is bored cleanly through the outer mortise wall with an auger or brace. The tenon is pulled out, and a corresponding hole is drilled through the tenon tongue-but with an intentional, microscopic offset: typically one-sixteenth to one-eighth of an inch closer to the tenon shoulder. The tenon is re-inserted into the mortise.
A hand-whittled, tapered wooden peg (a “trunnel” or dowel) made of dense, dried hardwood such as oak or hickory is driven into the misaligned hole using a heavy mallet. As the tapered peg forces its way through the offset holes, it acts as an immense mechanical wedge, flexing the tenon and physically dragging the tenon shoulder flush against the mortise face with several hundred pounds of permanent clamping pressure. A drawbored joint never loosens, remaining rock-solid for centuries even if the organic hide glue dries up or crystallizes completely.
Crucially, historic trunnels were never turned on a lathe into smooth, perfect cylinders. They were riven (cleft) by hand with a froe and drawknife along the natural wood grain, producing a faceted, polygonal cross-section. Because the wood fibers ran unbroken down the entire length of the peg, a cleft trunnel possessed immense shear strength. When driven into a round hole, the sharp corners of the polygonal peg bit deeply into the circular walls of the mortise, creating a mechanical friction lock that made withdrawal impossible.
4. The Dovetail Joint: Tensile Resistance and Cabinetmaking Royalty
If the mortise and tenon is the backbone of furniture framing, the dovetail joint is the supreme badge of honor in case-making, carcase construction, and drawer building.
The dovetail is engineered specifically to conquer one primary mechanical force: tensile pulling force. When an individual opens a heavy, fully loaded wooden drawer, pulling the drawer pull exerts immense outward tension along the front-to-side corner joints. A simple nailed or butted joint would pull apart within weeks. The dovetail solves this through trapezoidal interlocking geometry:
- The Tails: Trapezoidal flared projections cut into the drawer sides, resembling the spreading tail feathers of a dove.
- The Pins: Corresponding interlocking sockets cut into the drawer face.
Because the tails flare outward toward their tips, they physically lock into the pins like an anchor. The joint cannot be pulled apart along the horizontal tensile axis; it can only be assembled or disassembled in a single vertical direction. This mechanical interlock ensures that pulling on a drawer pull only pulls the flared tails tighter into their sockets.
The mathematical slope of the dovetail angle was carefully calibrated to the specific density of the timber. For softwoods like white pine or cedar, craftsmen utilized a steeper slope ratio of 1:6 (approximately 9.5 degrees), providing broader mechanical shoulders to prevent soft wood fibers from crushing under load. For dense hardwoods like Cuban mahogany, walnut, or quarter-sawn white oak, craftsmen adopted a shallower slope ratio of 1:8 (approximately 7 degrees), creating elegant, knife-thin pins that resisted splitting while maximizing long-grain glue adhesion.
5. Through, Half-Blind, and Full-Mitered Secret Dovetails
Across the seventeenth and eighteenth centuries, the visual presentation of dovetail joinery evolved to reflect shifting aesthetic tastes, leading to three distinct structural classifications:
Through Dovetails: Both the end grain of the tails and the end grain of the pins are completely visible on the exterior faces of the joint. Through dovetails were standard on sixteenth- and seventeenth-century blanket chests, tool chests, and utilitarian vernacular furniture where honest structural expression was celebrated.
Half-Blind (Lap) Dovetails: As fine cabinetmaking blossomed during the William and Mary and Queen Anne periods (1690-1750), wealthy patrons demanded smooth, unbroken wooden drawer fronts. In a half-blind dovetail, the pins are cut into the rear face of the drawer front, leaving the front quarter-inch of the drawer face solid and uncut. When the drawer is closed, the joint is completely hidden from view, revealing its glorious dovetail architecture only when the drawer is pulled open.
Full-Mitered (Secret) Dovetails: The absolute zenith of technical virtuosity, favored in high-end Japanese tansu and French Louis XV luxury bureaus. Both outer faces of the boards are mitered at a 45-degree angle, concealing the interlocking dovetails completely inside the corner. The piece looks like a simple mitered corner, yet possesses the unbreakable tensile strength of a multi-pin dovetail hidden permanently within.
6. The Anatomy of Hand-Cut Dovetails: Scribe Lines and Chisel Marks
For collectors and antique appraisers, the ability to authenticate an authentic hand-cut dovetail versus a modern machine-made joint is an essential connoisseurial skill.
A genuine eighteenth- or early nineteenth-century hand-cut dovetail carries distinct physical signatures:
- Narrow, Delicate Pins: Hand-cut dovetails typically feature exceptionally slender, needle-like pins-often tapering to a knife-edge width of barely one-sixteenth of an inch at their narrowest point. Machine routers cannot cut such slender pins because spinning router bits require clearance.
- Layout Scribe Lines: Hand craftsmen used a sharp marking knife or wheel gauge to scribe the depth baseline across the boards. Look closely at the baseline of the joint: you will invariably see a faint, razor-sharp incised line that extends slightly past the joint onto the raw wood surface.
- Chisel Overstrikes: When clearing out waste wood between pins, a cabinetmaker struck their bevel-edge chisel with a wooden mallet. You can often spot tiny, microscopic triangular overstrike indents on the baseline inside the joint cavity.
- Subtle Asymmetry: No two hand-cut pins or tails are mathematically identical in spacing or angle; slight variations of a fraction of a millimeter reveal the human hand at work.
7. The 1870 Industrial Watershed: Knapp Joinery (Pin and Cove / Scallop)
Between 1870 and 1900, American furniture manufacturing underwent a seismic technological revolution that left behind one of the most fascinating, instantly datable joints in antique history: Knapp Joinery (also known as the Pin and Cove, Scallop and Dowel, or Half-Moon joint).
Invented and patented in 1867 by Charles B. Knapp of Waterloo, Wisconsin, the Knapp dovetailing machine was the world’s first successful motorized, mechanized drawer-joint machine. Driven by steam-powered factory shafts, the machine cut a revolutionary joint: a round wooden peg (the pin) carved directly into the drawer side, which pressed into a corresponding semicircular scallop (the cove) drilled into the drawer front.
The Knapp joint was an engineering triumph of the Victorian Industrial Revolution: it was exceptionally strong, required zero hand chiseling, and allowed American factories to produce thousands of drawers per day. Because the Knapp joint was manufactured across a very specific, narrow historical window-roughly 1870 to approximately 1900-the presence of a pin-and-cove joint on a dresser drawer provides collectors with an indisputable, foolproof chronological benchmark confirming late-nineteenth-century Victorian production.
8. The Butterfly Key (Dutchman): Grain Stabilization and Nakashima’s Legacy
When a cabinetmaker works with wide slabs of rare, figured timber-such as curly maple, crotch walnut, or ancient cherry-natural internal drying stresses often cause the timber to develop longitudinal checks or cracks along its pith.
Rather than discarding this precious timber, traditional craftsmen developed the butterfly key (also known as a dovetail key, bowtie, or Dutchman). Carved from a dense, contrasting hardwood (such as dark ebony inserted into golden oak), the butterfly key is an hourglass-shaped double-dovetail. The wood grain of the key runs perpendicular to the crack in the main board.
The craftsman chisels out a corresponding hourglass cavity spanning the crack and taps the key tightly into place. Because both ends of the key flare outward, it mechanically clamps the two sides of the crack together, preventing the wood from splitting further while creating a stunning, honest decorative statement. In the twentieth century, Japanese-American woodworking master George Nakashima elevated the butterfly key into high modernist art, celebrating natural live-edge slab furniture and proving that structural repairs could embody the Japanese aesthetic philosophy of Wabi-Sabi.
Proper mechanical execution of a butterfly key requires precise depth calibration: the key should penetrate roughly one-third to one-half the total thickness of the slab. If cut too shallow, the key lacks the tensile strength to resist seasonal moisture movement; if cut too deep, it weakens the underlying timber core. In masterworks, butterfly keys were often inserted on both top and bottom faces in staggered positions, distributing mechanical holding force evenly through the board without creating localized stress points.
9. The Sliding Dovetail: Shelf Carcases and Tabletop Expansion
While standard dovetails join boards at external corners, cabinetmakers faced another structural challenge: how to attach horizontal shelves into the middle of vertical bookcase sides, or how to attach reinforcing battens beneath large dining tables, without visible screws or nails.
The solution was the sliding dovetail (French dovetail). A tapered, flared tenon is cut along the entire edge of the shelf board, while a corresponding dovetail slot (housing) is routed or chiseled across the face of the receiving side board. The tenon is slid horizontally into the housing from the rear.
The sliding dovetail is a mechanical masterpiece: it locks the shelf permanently into the case, preventing the case sides from bowing outward under heavy loads of books. Furthermore, when used beneath wide dining tabletops as a cross-batten, the sliding dovetail is glued only at the center point, allowing the rest of the tabletop to slide freely along the batten’s dovetail track as the table expands and contracts with the seasons, completely preventing buckling.
10. Traditional Organic Adhesives: The Chemistry of Hide Glue
One of the most misunderstood aspects of antique furniture is the adhesive that held historic joints together. Modern woodworkers rely on synthetic PVA (polyvinyl acetate) yellow carpenter’s glues or polyurethanes; antique furniture, however, was assembled exclusively with hot hide glue.
Hide glue is an organic protein adhesive manufactured by boiling animal connective tissue, skin, and bones (collagen). In the workshop, dry hide glue granules are dissolved in water inside a cast-iron electric or water-jacketed glue pot kept at a constant temperature of roughly 140 degrees Fahrenheit (60 degrees Celsius). When applied hot, the liquid protein penetrates deep into the cellular pores of the wood.
Hide glue possesses extraordinary chemical properties that modern synthetic glues lack:
- Reversibility: Hide glue can be dissolved and softened at any time with gentle steam, warm water, and heat. A restorer can take a 250-year-old chair apart completely, repair broken wood, and reassemble it without damaging the original fibers. Synthetic PVA glue, by contrast, is irreversible and destroys wood cells when joints are forced apart.
- Glass-Like Rigidity: Hide glue dries as hard as glass, transmitting acoustic vibrations and resisting creep under long-term tension. PVA glues remain slightly elastomeric, allowing joints to sag over decades.
- Self-Clamping “Rubbed Joints”: When hot hide glue cools, it undergoes a rapid molecular tacking phase, allowing craftsmen to rub two boards together until they lock in place without mechanical clamps.
Historically, hide glue was graded by its Bloom gram strength, ranging from 135-gram (low elasticity, fast gel time) up to 251-gram or 315-gram strength for structural joints. For complex case assemblies requiring longer assembly times, eighteenth-century artisans mixed urea or table salt into the warm glue solution, which temporarily suppressed molecular gelation, extending working open time from two minutes to twenty minutes without compromising the cured joint’s final tensile rigidity.
11. Breadboard Ends: Taming the Movement of Wide Table Tops
If you examine an authentic seventeenth- or eighteenth-century farm refectory table, dining table, or tavern tabletop, you will notice narrow horizontal boards capping the short ends of the long table planks: the breadboard ends.
Breadboard ends perform two vital functions: they conceal the rough end grain of the table planks, and they physically hold the wide boards flat, preventing them from cupping or warping over time. However, building an authentic breadboard end requires profound respect for wood movement.
A long tenon is cut across the entire width of the main tabletop planks, fitting into a deep groove chiseled inside the breadboard cap. Crucially, the breadboard end is glued only at the dead center of the table. The outer edges of the tenon are secured with wooden dowels that pass through slotted, oval-shaped holes inside the tenon. This allows the wide main planks to expand and contract freely along the dowel slots throughout the year. If an amateur woodworker glues a breadboard end across its entire width, the main table planks will crack and tear apart within twelve months.
12. Corner Blocks and Web Frames: Internal Reinforcement Architecture
The structural integrity of antique seating-such as dining chairs, armchairs, and stools-depends on an internal reinforcement system hidden beneath the upholstery: corner blocks (glue blocks).
A chair is subjected to violent, dynamic multi-directional racking forces every time a human sits, leans back, or rocks on its rear legs. The primary mortise and tenon joints connecting the seat rails to the legs cannot bear this punishment alone. Cabinetmakers glued triangular or rectangular hardwood blocks into the four inside corners of the seat frame.
In authentic eighteenth-century English and American furniture (Chippendale and Hepplewhite), corner blocks were hand-planed out of inexpensive secondary woods (pine, poplar, or chestnut) and secured with hot hide glue and hand-forged rosehead or cut iron screws. In high-grade case pieces (such as chests of drawers), horizontal partitions between drawers were reinforced with a complete web frame (dust board frame), which separated drawers, kept out dust, and held the large case square and rigid against racking.
13. Hand-Planed Surfaces and Tool Marks: Scrub Planes and Ripping Scars
Beyond the joints themselves, the secondary surfaces of antique furniture-the undersides of tabletops, the backs of chests, and the bottoms of drawers-are rich historical archives of traditional woodworking hand tools.
Prior to the invention of motorized thickness planers in the mid-nineteenth century, raw lumber from the sawmill was smoothed entirely by hand using a sequence of wooden bench planes:
- The Scrub Plane: Fitted with a heavily curved, convex iron blade, the scrub plane was driven diagonally across the grain to hog off rough sawmill marks. It left behind a distinctive, undulating washboard texture of shallow, overlapping scoops.
- The Jack and Try Planes: Long-soled planes used to flatten the ridges and true the surface.
- The Smoothing Plane: Used for final surfacing, leaving subtle, whisper-thin plane tracks (scallops) where the edges of the hand-sharpened blade met the wood.
When you feel the rear backboard of an authentic eighteenth-century tall-case clock or the bottom of a drawer, you should feel this warm, rippling, hand-planed surface. A perfectly flat, dead-smooth surface with circular rotary sanding swirls is an immediate giveaway of modern plywood or motorized machinery.
14. The Secret of Secondary Woods: Pine, Poplar, Chestnut, and Oak
In high-grade antique connoisseurship, seasoned appraisers often spend more time examining the interior and underside of a piece than the exterior show wood: the study of primary versus secondary woods.
Primary Wood: The expensive, visible timber used for show surfaces: Cuban mahogany, French walnut, figured tiger maple, or satinwood. These woods were chosen for beauty, fine grain, and lustrous patina.
Secondary Wood: The utilitarian, structural timber used for unexposed components: drawer sides, drawer bottoms, backboards, corner blocks, and internal dust dividers. Cabinetmakers used whatever sturdy, inexpensive local wood was abundant in their geographic region. In New England, cabinetmakers utilized white pine and basswood; in the American Mid-Atlantic and South, they used yellow pine, tulip poplar, and red gum; in England and France, they favored European oak and Scots pine. Identifying the secondary wood and its joinery often allows scholars to trace an unsigned eighteenth-century chest to a specific county or workshop with geographic certainty.
15. The Chronological Evolution: From Carolean Heavy Oak to Federal Neoclassicism
Furniture joinery underwent dramatic architectural transformations across four centuries, mirroring broader cultural, architectural, and philosophical movements:
Seventeenth-Century Jacobean and Carolean (1600-1690): Characterized by massive, heavy oak “joined” construction. Frames were built entirely with heavy mortise and tenons secured with prominent, faceted drawbore wooden pegs. Drawers were crude, joined with heavy through-dovetails or simple nailed rabbits.
William and Mary (1690-1725): The birth of delicate cabinetmaking. Introduction of walnut veneers, half-blind dovetails on drawers, and thin turned trumpets and ball feet. Dovetails were robust, with wide tails and large pins.
Queen Anne and Chippendale (1725-1785): The golden age of hand craftsmanship. Graceful cabriole legs, ball-and-claw feet, and razor-fine dovetails with pin heads tapering to tiny fractions of an inch. Solid mahogany and walnut construction with full dust boards between drawers.
Federal and Hepplewhite (1785-1820): Geometric neoclassicism. Straight, tapered legs, delicate satinwood stringing inlays, and wafer-thin drawer sides joined with needle-thin dovetails, emphasizing lightness, architectural grace, and geometric restraint.
16. Restorer’s Ethics: Reversible Conservation vs. Destructive Modernization
In the antique restoration profession, the philosophy of conservation has undergone a radical shift toward strict ethical preservation, codified by the American Institute for Conservation (AIC).
Historically, aggressive restorers caused irreversible damage: stripping away historic finishes with caustic lye, sanding away original tool marks with belt sanders, drilling through authentic mortises to insert steel lag bolts, and repairing loose joints with modern epoxy or polyurethane glues. These modern glues dry harder than the surrounding wood; when the wood shifts, the glue joint holds while the antique wood rips itself apart.
Ethical conservation mandates three non-negotiable principles:
- Reversibility: Any adhesive, finish, or reinforcement applied to an antique must be completely removable by a future conservator without harming original historic fabric. Use only traditional hot hide glue and natural shellac.
- Minimum Intervention: Conserve as much original wood as possible. Never replace an entire drawer side if a localized Dutch patch (spline) can stabilize the wear groove.
- Patina Preservation: Never sand or strip original patina. The oxidized, darkened surface of old wood, stained by centuries of beeswax and atmospheric exposure, is the soul and financial value of the piece.
17. Practical Workshop Restoration: Repairing Loose Mortises and Worn Drawer Runners
The most common functional ailment encountered in antique furniture is the worn drawer runner and loose mortise-and-tenon joint.
After two centuries of daily opening and closing, the bottom wooden edge of a drawer side (which glides on the internal wooden runner) wears down by a half-inch or more, causing the drawer to sag, scrape the drawer divider, and jam. To restore this properly without replacing original timber, a master restorer executes a drawer runner re-facing (slip patching).
The restorer uses a hand plane to true the worn, grooved bottom edge of the drawer side. A strip of quarter-sawn hardwood (cherry or beech) matching the species is planed to the exact thickness and glued to the bottom edge using hot hide glue. Once cured, the slip patch is planed flush with the original drawer side and lubricated with pure paraffin wax or beeswax. The drawer glides effortlessly into the case once more, operating with the smooth, airtight piston-like action of a newly built heirloom.
18. Collector’s Field Checklist: How to Authenticate Genuine Period Furniture
When standing in an antique gallery, auction preview, or estate sale, armed with a flashlight and an educated eye, use this definitive field checklist to distinguish authentic period furniture from nineteenth-century revivals or twentieth-century fakes:
1. Pull the Drawers Completely Out:
Inspect the front and rear dovetails. Are the pins razor-thin, slightly uneven, and accompanied by knife scribe lines? Or are the pins and tails perfectly uniform, identical, and rounded at the bottom (indicating a twentieth-century motorized router template)?
2. Check for Wood Shrinkage and Out-of-Round Turnings:
Because wood shrinks across its width but not its length, a round turned bedpost or chair leg from 1780 will no longer be mathematically round; it will be slightly oval. Use a caliper or wrap your fingers around the turning: an authentic antique turning will feel distinctly oblong due to two centuries of tangential shrinkage.
3. Examine Secondary Surfaces with Raking Light:
Shine your flashlight at a low angle across the backboards and drawer bottoms. Look for the shallow, undulating ripples of hand scrub planes. If you spot straight vertical saw teeth marks (from an early up-and-down water-powered sash mill) or hand plane scoops, you have period timber. If you spot curved circular saw arcs, the wood was processed after 1840.
4. Check Hardware and Fasteners:
Remove a brass drawer pull. The threaded post should have irregular, hand-cut threads and be secured by an irregular, hand-forged square brass or iron nut. The wood beneath the brass plate should be lighter and cleaner than the surrounding oxidized wood, confirming the hardware has lived with the piece for generations.
Comparative Analysis of Historic Woodworking Joinery Methods
To fully evaluate the craftsmanship of antique furniture across different centuries and cultures, one must understand how each joinery method balances mechanical strength, tensile resistance, aesthetic visibility, and labor complexity.
The progression of joinery reflects both technological evolution-from primitive stone and iron hand tools to steam-driven factory cutters-and shifting cultural philosophies regarding whether the joint should be boldly celebrated on the exterior or discreetly hidden within architectural contours. The following comparative matrix contrasts the core mechanical attributes, primary historical applications, tensile resistance, and visual signatures across the primary traditional joints.
| Joinery Method | Primary Structural Role | Tensile / Racking Resistance | Key Historical Era | Connoisseurial Identification Hallmark |
|---|---|---|---|---|
| Mortise and Tenon | Frame and panel, table legs, chair rails | Exceptional racking resistance; high long-grain glue area | Ancient Egypt to present; Jacobean staple | Hand-chiseled mortise pockets; drawbored wooden pegs |
| Hand-Cut Half-Blind Dovetail | Drawer fronts to sides in high-style case pieces | Maximum outward tensile pulling resistance | Queen Anne, Chippendale, Federal (1720-1820) | Needle-thin pins, knife scribe baselines, subtle asymmetry |
| Knapp Joint (Pin & Cove) | Factory drawer construction during Industrial Era | Very high tensile strength; mechanized interlocking dowel | Victorian America (Strictly 1870-1900) | Circular wooden plug sitting inside semicircular scallop |
| Butterfly Key (Dutchman) | Stabilizing natural splits and checks in wide slabs | High lateral clamping tension across grain cracks | Japanese traditional carpentry; George Nakashima | Hourglass bow-tie profile; perpendicular grain alignment |
Frequently Asked Questions About Antique Furniture Joinery
What is the primary difference between a hand-cut dovetail and a machine-cut dovetail?
Hand-cut dovetails feature slender, delicate pins that taper to a narrow point, subtle variations in spacing, knife-scribed layout lines running across the baseline, and small chisel marks. Machine-cut dovetails (made with electric router templates after the 1890s) feature rounded inside corners, identical wide pins and tails, and zero scribe lines.
What is a drawbored mortise and tenon joint?
A drawbore is a traditional mechanical locking technique where a hole is drilled through the mortise walls and an intentionally offset hole is drilled through the tenon tongue. When a tapered hardwood peg (trunnel) is driven into the offset holes, it pulls the tenon deep into the mortise with hundreds of pounds of pressure, creating a rock-solid joint that never requires glue.
What is a Knapp joint and why is it so significant to antique collectors?
Invented in 1867 by Charles Knapp, the Knapp joint (also called pin and cove or scallop) was the first successful machine-made drawer joint. Characterized by a round wooden pin set inside a half-moon scallop, it was used exclusively between 1870 and 1900 in American factories, providing collectors with an infallible method to date Victorian furniture.
Why is hot hide glue superior to modern yellow PVA glue for antique restoration?
Hide glue is 100% reversible with warm water and steam, allowing future conservators to disassemble and repair joints without damaging original wood fibers. Modern PVA and polyurethane glues are permanent, non-reversible, and cause adjacent wood to tear apart when stressed. Furthermore, hide glue dries as hard as glass and resists joint creep.
What purpose do breadboard ends serve on antique dining tables?
Breadboard ends are horizontal hardwood caps attached to the ends of table planks to keep them flat and prevent warping. Because wood expands and contracts across its width with seasonal humidity, authentic breadboard ends are glued only at the center and secured with wooden dowels through elongated slots, allowing the main boards to move freely without cracking.
What are secondary woods and why do antique appraisers examine them?
Secondary woods are the structural timbers used for unexposed areas such as drawer sides, backboards, and internal frames (e.g., pine, poplar, oak, chestnut). Because cabinetmakers used inexpensive local timber for these parts, identifying the secondary wood allows appraisers to determine the specific geographic region and workshop where an unsigned antique was made.
Why do authentic antique chair legs often feel slightly oval rather than round?
Wood is anisotropic: it shrinks tangentially and radially across its grain as it loses moisture, but does not shrink along its length. Over two centuries of indoor drying, a round turned post shrinks unevenly along its grain rings, transforming its cross-section from a perfect circle into a subtle oval shape that can be felt by hand.
What is a butterfly key and when was it traditionally used?
A butterfly key (or Dutchman) is an hourglass-shaped double-dovetail key inlaid across a natural split or crack in a board. Its flared ends physically clamp the crack together, preventing it from spreading further while celebrating the natural character of figured timber, famously popularized in modern studio furniture by George Nakashima.
Conclusion: The Eternal Integrity of Handcrafted Timber
In a contemporary civilization dominated by mass-produced disposable furniture engineered from glued sawdust and synthetic laminates, antique furniture joinery stands as a timeless sanctuary of human ingenuity and material respect. It is a tangible physical testament to a historical era when craftsmen did not measure their success by quarterly production volumes, but by whether the work of their hands would endure to shelter the possessions and memories of generations yet unborn.
When you pull out an authentic eighteenth-century drawer and admire the delicate, hand-chiseled pins of a half-blind dovetail, or examine the drawbored wooden pegs holding a tenon firmly in its mortise, you are beholding an unbroken line of human knowledge passed down across millennia. These joints are not mere mechanical fasteners; they are an architectural covenant between the craftsman, the forest, and the relentless flow of time: proving that true craftsmanship never perishes, but grows richer, wiser, and more beautiful with every passing century.
Scholarly Citations and Authoritative Woodworking Archives
- Winterthur Museum, Garden & Library: Winterthur Decorative Arts Collection: American Furniture Joinery and Regional Schools (winterthur.org)
- Metropolitan Museum of Art: The American Wing: Masterpieces of Eighteenth-Century Cabinetmaking (metmuseum.org)
- Victoria and Albert Museum: V&A Furniture Collection: British and European Joinery Traditions (vam.ac.uk)
- American Institute for Conservation (AIC): Wooden Artifacts Group Guidelines for Ethical Furniture Conservation (culturalheritage.org)
- Smithsonian Institution: Museum Conservation Institute: Hide Glues, Timber Movement, and Joinery Mechanics (si.edu)
- Internal Archive: Anemoia Vintage Culture and Heritage Craftsmanship Repository

