

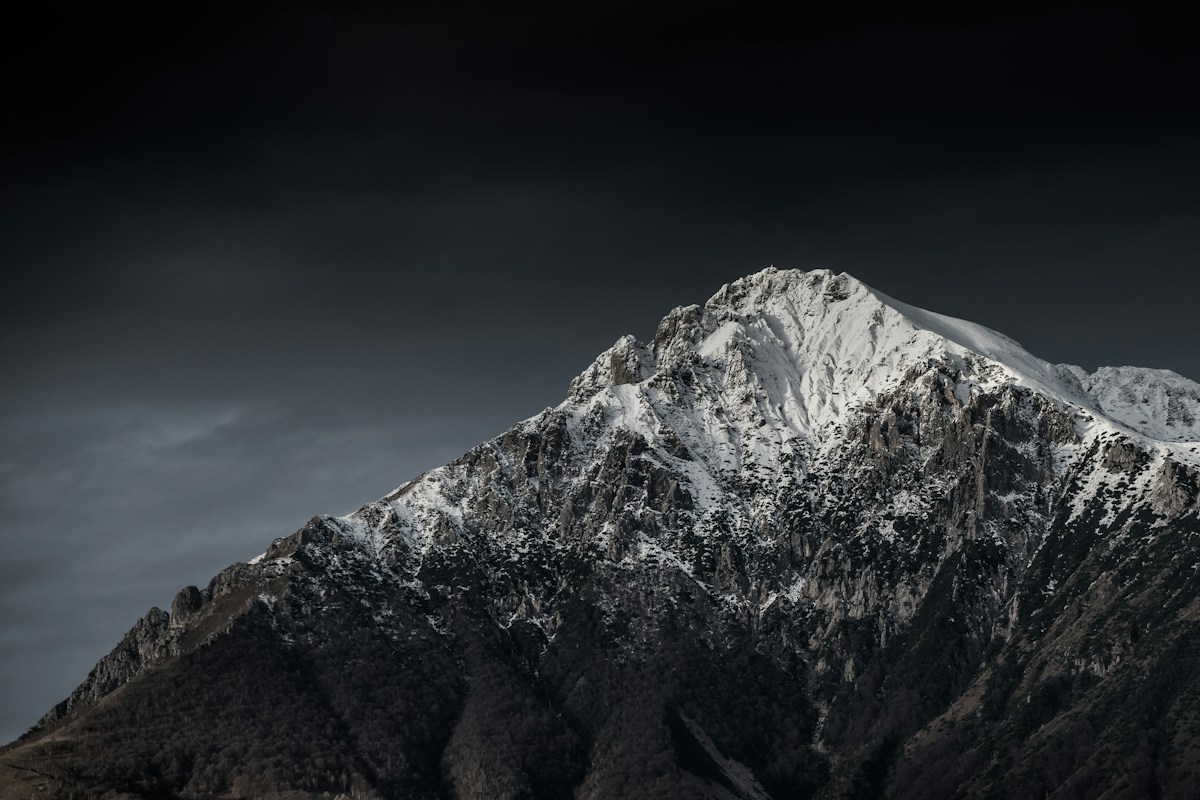
On an autumn afternoon in 1941, driving down Highway 84 through the Rio Grande Valley of New Mexico, Ansel Adams glanced out his station wagon window and slammed on the brakes. Rising above the tiny desert village of Hernandez was an extraordinary celestial vision: a brilliant waxing moon suspended in a pale turquoise sky above snow-capped peaks, while the foreground adobe church and whitewashed cemetery crosses caught the dying, amber light of the setting sun. Desperate to capture the transient spectacle before the sun slipped below the horizon, Adams scrambled to erect his heavy 8×10 view camera. In the frantic rush, he could not locate his Weston exposure meter.
Most photographers facing such a technical emergency would have guessed an exposure, fired blindly, and hoped for good fortune. But Adams did not need an exposure meter. Having spent years developing an exact scientific bridge between physical sensitometry and aesthetic visualization, he recalled the exact luminance of the full moon: 250 candles per square foot. In a flash of mental calculation, he placed the moon’s luminance on Zone VII, calculated his exposure at 1 second at f/32 on Cook Panatomic film, and released the shutter. The result was Moonrise, Hernandez, New Mexico-one of the most celebrated, valuable, and emotionally arresting photographs in the history of human art.
The technical engine that made such mastery possible was the Zone System, formulated by Ansel Adams and Fred Archer at the Art Center School in Los Angeles in 1939-1940. Far from an obsolete historical relic of analog darkrooms, the Zone System remains the most profound, intellectually rigorous method for understanding light, dynamic range, and tonal translation ever devised. In this comprehensive masterclass, we explore the complete physics, chemical sensitometry, and digital translation of the Zone System, empowering modern photographers to command light with absolute creative authority.
1. Pre-Visualization: The Foundational Philosophy of Photographic Vision
Before examining the mathematics of exposure zones or the chemistry of development times, one must understand the philosophical core of the Zone System: pre-visualization. Adams insisted that a photograph is not made when the shutter clicks, nor when the negative is developed, nor when the final print is washed. A photograph is created in the mind of the photographer before the camera is even mounted to the tripod.
Pre-visualization demands that the artist actively decouple what their biological eyes see in the physical world from what the photographic medium will record. Human vision is dynamic, non-linear, and equipped with continuous cognitive auto-exposure: our pupils dilate when looking into shadows and contract when looking at bright clouds, tricking our consciousness into perceiving an artificially flattened dynamic range. Photographic emulsions and digital sensors, by contrast, possess fixed, rigid boundaries of luminance tolerance.
To pre-visualize an image is to look at a physical scene-a granite cliff face, a sunlit snowbank, a weathered wooden doorway-and make conscious aesthetic choices regarding where every single value of that scene should fall on the finished grayscale print. Do you want that shadowed granite wall to appear dark and brooding with subtle mineral texture, or do you want it rendered as an impenetrable, jet-black silhouette? Once that creative choice is made, the Zone System provides the exact scientific formula required to guarantee that the finished image matches your mental blueprint.
2. Ansel Adams and Fred Archer: Codifying Sensitometry into Practical Craft
During the 1930s, photographic instruction was dominated by vague, subjective rules of thumb and secretive darkroom recipes. Professional photographers spoke mysteriously of “feeling the light” or relying on proprietary chemical brews to rescue poorly exposed negatives. Across the Atlantic, European sensitometrists like Ferdinand Hurter and Vero Charles Driffield had mapped the rigorous scientific laws of photographic exposure and density, but their complex calculus was locked in academic journals incomprehensible to practicing artists.
The monumental contribution of Ansel Adams, working alongside fellow teacher and portrait photographer Fred Archer at the Art Center School, was to translate complex sensitometric science into an intuitive, practical working methodology for working photographers. They took the infinite continuum of natural light and divided it into discrete, easily manageable increments: the Zones.
Adams recognized that photography is a two-step expressive process: recording the negative in the camera (exposure) and interpreting that negative in the print (development and printing). By creating a standardized, repeatable framework connecting light meters, lens apertures, film development times, and darkroom paper grades, Adams and Archer liberated photography from guesswork, transforming it into a precise, expressive visual language akin to musical composition.
3. The 18% Gray Fallacy: Understanding the Reflectance Light Meter
To master the Zone System, every photographer must confront and dismantle the central limitation of optical exposure meters: the 18% reflectance standard. Whether you are using a 1950s handheld analog spot meter or the multi-zone matrix metering sensor inside a modern 2026 digital mirrorless camera, all reflective light meters operate on an identical, unthinking assumption.
A reflective light meter measures the light bouncing off a subject, but it has no cognitive awareness of what that subject actually is. It cannot distinguish between a black velvet tuxedo, a gray concrete sidewalk, or a brilliant white bridal gown. The light meter is engineered to calculate an exposure that will render whatever it is pointed at as an average, neutral middle gray-defined in sensitometry as 18% reflectance (Zone V).
Consider what happens when an automated camera meters an expansive field of pristine white snow in full sunlight. The meter measures the intense luminance, assumes it is looking at an excessively illuminated middle gray, and selects an exposure that underexposes the scene, turning the sparkling white snow into a dull, muddy, depressing gray. Conversely, if pointed at a black charcoal briquette in a dim room, the meter overexposes, turning the coal into middle gray. An exposure meter does not tell you the correct exposure; it merely tells you what exposure is required to force the metered area into Zone V. The photographer must exercise creative agency to place that luminance on its proper zone.
4. The Roman Numeral Scale: Detailed Anatomy of Zones 0 Through X
The classical Zone System divides the total dynamic range of human vision and photographic printmaking into eleven distinct steps, designated by Roman numerals from Zone 0 to Zone X. Each adjacent zone represents an exact photographic stop: a doubling or halving of the light (a 1-EV increment).
The eleven zones are categorized into three distinct operational regions:
- The Low Zones (Shadow Thresholds):
- Zone 0: Maximum Black (D-max). Complete absence of light; pure paper black with zero detail.
- Zone I: Threshold Density. The earliest perceptible departure from total black; deep gloom with no readable texture.
- Zone II: First Hint of Texture. Deepest textured shadow; subtle dark details in dark clothing or bark.
- Zone III: Standard Textured Shadow. Full, rich shadow detail; weathered dark wood, dark foliage, deep fabric folds.
- The Mid Zones (Values and Skin Tones):
- Zone IV: Dark Midtone. Typical foliage in landscape work, weathered rock, deeply tanned skin.
- Zone V: Middle Gray (18% Reflectance). The universal calibration standard; clear north sky, average weathered stone, Caucasian skin in shadow.
- Zone VI: Light Midtone. Average Caucasian skin in sunlight, light stone, sand dunes under overhead light.
- The High Zones (Highlight Values):
- Zone VII: Standard Textured Highlight. Full, delicate highlight detail; sunlit snow, pale skin, white textured walls.
- Zone VIII: Highlight Threshold. Delicate highlight separation; glistening highlights on water, white painted surfaces.
- Zone IX: Pure Blank White. Flat paper base white; specular highlights on chrome or polished glass with zero detail.
- Zone X: Pure Light Source. Blown-out sun, raw arc lamps; complete total burnout.
5. The Golden Rule of Sensitometry: Expose for Shadows, Develop for Highlights
In classical black-and-white photography, every darkroom master memorizes a foundational maxim that governs the entire physical craft: “Expose for the shadows, and develop for the highlights.” This rule is not an arbitrary aesthetic guideline; it is an absolute physical consequence of how chemical development works on silver halide emulsions.
When film is exposed inside the camera, the low shadow zones (Zones I, II, and III) receive very few photons. Consequently, only a tiny handful of silver halide crystals form latent image centers in those areas. During chemical development, these sparse shadow crystals are reduced into metallic silver within the first few minutes of immersion in the developer. Once those few crystals are fully reduced, shadow development halts; further immersion in the developer cannot create silver that received no light exposure. Therefore, shadow density is governed almost entirely by initial camera exposure.
The bright highlight zones (Zones VII, VIII, and IX), however, received massive amounts of light, creating billions of latent image centers. Development in these highlight areas continues actively throughout the entire development cycle, steadily depositing silver layer upon layer. If you extend development time, the highlights become denser and denser (higher contrast). If you shorten development time, you restrain highlight buildup while leaving the shadows unaffected. Therefore, highlight density and overall contrast are governed almost entirely by chemical development time.
6. Sensitometry and Characteristic Curves: The D-Log E Hurter and Driffield Curve
To understand the Zone System with scientific precision, one must examine the Characteristic Curve (also known as the D-Log E curve or H&D curve), first mapped in 1890 by Ferdinand Hurter and Vero Charles Driffield. The characteristic curve plots optical density (D) on the vertical Y-axis against the logarithm of exposure (Log E) on the horizontal X-axis.
A typical photographic film curve consists of three distinct anatomical regions:
- The Toe: The lower non-linear region where exposure begins to lift off from base-plus-fog (D-min). In the toe, equal increases in exposure produce disproportionately small increases in density. This corresponds to Zones 0, I, and II, explaining why extreme shadow details compress and lose separation.
- The Straight-Line Portion: The central, linear region of the curve where density increases in direct mathematical proportion to exposure. The slope of this straight-line portion defines the gamma (γ) or contrast index of the film. Zones III through VIII fall across this linear slope, ensuring natural, realistic tonal gradation.
- The Shoulder: The upper curved region where the emulsion approaches chemical saturation. In the shoulder, additional exposure produces diminishing density increases, gently rolling off highlight values. Traditional thick-emulsion black-and-white films possess long, generous shoulders that prevent harsh highlight clipping.
7. Subject Brightness Range (SBR) and Expansion/Contraction Kinetics
In natural outdoor environments, the dynamic range of light varies wildly depending on weather, geography, and time of day. The measure of this dynamic range is known as the Subject Brightness Range (SBR)-the difference in light value between the deepest shadow where detail is desired and the brightest highlight where texture must be preserved.
In a “normal” scene, the SBR is approximately five stops (a 1:32 luminance ratio). When a normal scene is exposed correctly, Zone III falls on the lower straight line of the film curve, while Zone VIII falls comfortably at the upper straight line. This negative can be developed for standard time (designated as N development) and printed effortlessly on normal Grade 2 paper.
However, nature rarely provides perfectly normal lighting. In a flat, overcast misty forest, the SBR might span only two or three stops (a flat, low-contrast scene). If processed normally, the resulting negative will be thin and lifeless. Conversely, inside a deep desert canyon with brilliant midday sun blazing on white limestone while the riverbed sits in dark shade, the SBR might span eight, nine, or ten stops (an extreme high-contrast scene). If processed normally, the highlights will block up into an unprintable, dense mass of black silver. This is where Adams introduced the revolutionary concepts of N+ (expansion) and N- (contraction) development.
8. The Mechanics of N+ and N- Chemical Controls
The brilliance of the Zone System lies in its ability to bend the laws of natural contrast through tailored chemical development, compressing or expanding the negative’s tonal scale to fit the standard printing paper scale perfectly.
N- Development (Contraction for High-Contrast Scenes): When shooting a harsh desert scene where the shadow falls on Zone III and the highlight falls on Zone IX (a 6-stop spread, one stop too contrasty), the photographer intentionally reduces chemical development time (typically by 20% to 30%). This is designated as N-1 development. The shortened development time pulls Zone IX down to Zone VIII density, preventing highlight burnout, while Zone III shadows remain fully developed and rich. For an extreme 7-stop spread, the photographer uses N-2 development (reducing time by 40% to 50%), successfully taming extreme contrast.
N+ Development (Expansion for Low-Contrast Scenes): When shooting a foggy seascape where shadows fall on Zone III and highlights reach only Zone VI (a flat 3-stop spread), the photographer extends development time (typically by 30% to 50%). This is designated as N+1 or N+2 development. The prolonged development forces the highlights to build up dense silver, pushing Zone VI up to Zone VII or Zone VIII, injecting vibrant, snappy contrast into an otherwise dreary, flat scene.
9. Spot Metering in the Field: Precision Luminance Mapping
Executing the Zone System requires a specialized optical instrument: the 1-degree spot meter (such as the classic Pentax Digital Spotmeter or Sekonic L-758). Unlike broad multi-zone or averaging meters that take an uncritical average of the entire landscape, a spot meter measures an ultra-narrow 1-degree cone of acceptance, allowing the photographer to sample luminance from tiny, specific elements of the scene miles away.
Field methodology involves systematic luminance mapping:
- Locate the Critical Shadow: Identify the darkest element in the scene where you demand full, readable texture (e.g., dark moss under a wet rock). Point the spot meter and read the EV value (e.g., EV 7).
- Place the Shadow on Zone III: Remember that the meter assumes EV 7 is Zone V. To place it on Zone III (two stops darker), subtract 2 stops: EV 7 – 2 = EV 5. This establishes your base camera exposure.
- Read the Critical Highlight: Point the spot meter at the brightest area where texture must be retained (e.g., sunlit foamy waterfall). Read the EV value (e.g., EV 11).
- Calculate the Zone Fall: Measure the difference between your base exposure (EV 5) and the highlight (EV 11): 11 – 5 = 6 stops. Starting from Zone 0, six stops up lands on Zone VI. If you want that waterfall to shine brilliantly on Zone VIII, you need two stops of expansion: you mark the film holder for N+2 development.
10. Large Format Sheet Film: The Purest Physical Vehicle for the Zone System
The Zone System achieved its absolute, purest physical realization through Large Format Sheet Film (4×5, 5×7, and 8×10 view cameras). Because large format cameras utilize individual sheet film holders that contain only two sheets of film per holder, each individual photograph can be treated as a unique, customized chemical experiment.
When an 8×10 photographer exposes a negative in Yosemite Valley, they write the exposure notes directly onto the white pencil tab of the film holder: “Sheet A: El Capitan, 1/4s @ f/22, Zone III on granite base, N-1 development.” Back in the darkroom, each sheet is developed individually in open trays or dedicated daylight tanks, running specific development times calibrated to the exact fraction of a second.
Furthermore, large format negatives possess an immense physical surface area (an 8×10 negative is roughly sixty times larger than a 35mm frame). Grain becomes practically invisible, tonal transitions are silky and continuous, and the physical density of silver provides an incomparable sense of tactile depth and three-dimensional realism that no smaller format can achieve.
11. The Roll Film Dilemma: Applying Zone Principles to 35mm and Medium Format
For street photographers, documentary chroniclers, and photojournalists shooting 35mm or 120 roll film, the Zone System presents a formidable practical challenge: the roll film dilemma. A single roll of 35mm film contains 36 exposures, and the entire roll must be developed simultaneously in a single tank for a single, uniform development time.
If frame 1 is an extreme high-contrast sunny street scene requiring N-2 contraction, and frame 2 is a flat overcast portrait requiring N+1 expansion, developing the roll for N-2 will leave the portrait hopelessly thin and muddy, while developing for N+1 will blow the street scene’s highlights into an unprintable black mess.
Master roll film photographers solve this through two distinct strategies:
- Dedicated Roll Management: Carrying multiple camera bodies or interchangeable medium format film backs (such as Hasselblad A12 magazines), with each back dedicated to a specific development tier: Back 1 for Normal (N), Back 2 for Contraction (N-1/N-2), and Back 3 for Expansion (N+1).
- Exposing for the Minimum Density: In standard roll film shooting, the photographer meters the darkest critical shadow across all scenes on the roll and ensures it receives at least Zone III exposure, while developing the roll for slightly reduced development (N-0.5 or N-1). By keeping highlights restrained on the negative, modern variable-contrast darkroom papers and split-grade printing can easily restore midtone contrast during printing.
12. The Zone System in the Darkroom: Paper Grade Calibration and Maximum Black
A properly exposed and developed Zone System negative is only half of the equation; it must be matched to the exposure scale of the printing paper. Ansel Adams formulated the concept of Proper Proofing for Maximum Black to eliminate darkroom guesswork.
To calibrate an enlarger and paper combination, a contact sheet of the clear film rebate (the unexposed edge of the film containing only base-plus-fog density) is placed under the glass. The printer makes an incremental test strip across the rebate. The minimum exposure time that produces the deepest possible jet black (D-max) that the paper can produce-where further exposure yields no darker black-is the standard minimum proofing time.
When a negative developed via the Zone System is exposed at this standard minimum proofing time on a Grade 2 paper, an astonishing phenomenon occurs: the entire tonal scale falls into place automatically. The Zone III shadows print as deep, textured blacks; Zone V prints as perfect middle gray; and Zone VIII highlights print as luminous, textured whites. The negative requires zero dodging, zero burning, and zero manipulation; it prints itself because the science was resolved in the field.
13. Translating the Zone System to Modern Digital Sensors: ETTR vs. Zone Placement
In the twenty-first century, as digital sensors replaced silver halide emulsions, many commentators prematurely declared the Zone System obsolete. In reality, understanding the Zone System is MORE critical for digital photographers than it ever was for film shooters, because digital sensors behave in fundamentally the opposite way to negative film.
Negative film has a forgiving, soft shoulder in the highlights, but drops off steeply into harsh grain and mud in underexposed shadows. A digital sensor, conversely, behaves like color transparency (slide) film: it has an absolute, unyielding digital ceiling at 255 RGB (100% white). The instant a digital pixel clips, all photographic data is permanently lost to pure, unrecoverable white burnout.
However, modern digital raw files possess extraordinary shadow recovery capabilities. In digital shooting, the prevailing exposure technique is Expose to the Right (ETTR), pioneered by Michael Reichmann. ETTR uses the Zone System in reverse: the photographer uses spot metering or raw histograms to place the brightest non-specular highlight immediately below the clipping threshold (Zone VIII.5). This pushes maximum photon data into the sensor’s high-bit linear range (where more than half of all tonal levels are stored), minimizing shadow noise when the exposure is pulled down to normal Zone V and Zone III values during digital raw conversion.
14. Sensor Clipping, Raw Histograms, and Highlight Headroom
A dangerous pitfall for modern digital photographers attempting to use the Zone System is relying on the camera’s built-in in-camera histogram or highlight zebra stripes. Most photographers do not realize that the in-camera histogram displayed on their LCD screen is NOT a representation of the raw sensor data; it is an analysis of an 8-bit JPEG preview generated using the camera’s picture profile (such as Standard, Landscape, or Portrait).
Because JPEG processing applies an aggressive contrast curve and saturation boost, the in-camera histogram routinely indicates that highlights are blown out when the raw file actually possesses 1.5 to 2 full stops of unclipped highlight headroom. Photographers who panic and underexpose their image rob their raw files of critical shadow signal-to-noise ratio, introducing coarse color noise and banding into deep shadows.
Advanced digital Zone System practitioners utilize a customized picture profile with contrast and saturation dialed to absolute minimums (often termed a “UniWB” or flat profile). This aligns the camera preview closely with the true raw data, allowing the photographer to meter highlight zones with surgical accuracy right up to the sensor’s physical saturation point.
15. Post-Processing Zone System: Precision Masking and Parametric Tone Curves
In the modern digital darkroom (utilizing software such as Adobe Lightroom, Capture One, or Photoshop), the Zone System has been resurrected as the premier framework for precision tonal editing.
Modern raw developers now feature Luminance Range Masking and Parametric Tone Curves that map directly onto Ansel Adams’ eleven zones. Instead of dragging a global “Shadows” or “Highlights” slider that indiscriminately smears contrast across the entire image, a digital artisan uses luminance masking to isolate specific zone slices: targeting only Zone II and III for shadow de-noising, or isolating Zone VII and VIII for subtle micro-contrast enhancement.
Furthermore, dodging and burning-the classical darkroom technique of physically manipulating exposure during printing-is executed digitally with parametric curve masks. By carving the light locally, the digital artist ensures that the viewer’s eye is guided seamlessly through the composition, leading from deep, velvety low zones toward luminous, expressive highlight peaks.
16. Emotional Luminance: Using the Zone System as a Poetic Visual Language
Ultimately, the Zone System is not merely an engineering protocol for preventing blown highlights or blocked shadows; it is a profound poetic language of human emotion. In photography, the distribution of luminance values across a frame dictates the psychological mood of the viewer.
Consider the emotional difference between high-key and low-key compositions:
- Low-Key Dramatic Mood (Heavy Zones I through IV): Dominates the frame with deep shadows, rich textures, and mysterious obscurity. The few elements placed on Zone VII or VIII pierce through the darkness like beacons, creating feelings of solemnity, danger, sacred reverence, or existential contemplation (exemplified by the chiaroscuro street photography of Bill Brandt).
- High-Key Ethereal Mood (Heavy Zones VI through IX): Bathes the frame in open, luminous, airy values with delicate, whisper-soft shadow transitions. High-key imagery evokes innocence, tranquility, transcendence, and spiritual purity (exemplified by high-altitude snowscapes and minimalist Japanese ocean studies).
By mastering the Zone System, you stop allowing ambient weather to dictate the emotional tone of your photographs. You become an intentional director of light, consciously crafting the luminance architecture of your images to express your deepest internal artistic vision.
17. Common Zone System Errors: The Pitfalls of Mechanical Dogmatism
As photographers begin implementing the Zone System, they frequently succumb to several common mechanical errors that undermine their creative results:
1. Over-Engineering Middle Tones (The Muddy HDR Look): Novice zone photographers often become obsessed with packing every single element into Zone V, flattening natural contrast until the image resembles a dull, lifeless HDR simulation. A great photograph requires courage: shadows must be allowed to fall into deep, mysterious blackness, and specular highlights must be allowed to burn into pure white.
2. Misjudging Specular vs. Textured Highlights: Spot metering an open glare on water or polished chrome and attempting to place it on Zone VIII leads to catastrophic underexposure of the entire scene. Specular reflections contain no texture and belong naturally on Zone IX or X. Only textured white surfaces (snow, whitewash, clouds) should be placed on Zone VII or VIII.
3. Neglecting Flare Factor in High-Contrast Backlighting: When shooting directly toward a bright sun or open sky, internal optical flare inside the lens barrel bounces light onto the film or sensor, lifting deep shadows by one to two full stops. Photographers must account for flare factor by shortening exposure or shading the front lens element with deep lens hoods.
18. Masterpiece Deconstruction: Ansel Adams’ Moonrise, Hernandez, New Mexico
To witness the Zone System operating at its highest summit of artistic and technical mastery, we deconstruct the exact sensitometric mechanics of Adams’ Moonrise, Hernandez.
When Adams made that singular exposure in 1941, the natural lighting conditions were exceptionally difficult. The sun had already dropped below the horizon, plunging the foreground adobe buildings and dark sagebrush into deep shadow (Zone II and III). Meanwhile, the distant white cumulus clouds and the moon retained intense celestial brightness (Zone VII and VIII). The negative was exposed at 1 second at f/32.
Back in the darkroom, Adams recognized that standard N development would produce a weak, flat sky with minimal separation between the moon and the upper atmosphere. In subsequent darkroom sessions, Adams executed an aggressive post-development chemical intervention: he submerged the lower portion of the negative in a tray of potassium ferricyanide (Farmer’s Reducer), chemically bleaching the sky area to lower its base density, which allowed him to burn the sky down to an ominous, inky midnight black during printing. This master manipulation transformed a good documentary snapshot into a timeless, metaphysical monument of American art.
19. Comparative Diagnostic Matrix: The Complete Zone Scale and Sensitometric Equivalents
To systematically summarize the technical, optical, and tonal values across the complete Zone System, we must contrast each zone across its physical, digital, and visual manifestations. Understanding these exact equivalents enables photographers to translate abstract light meter readings into precise digital raw values and physical darkroom print densities.
The comparative diagnostic matrix below outlines Zones 0 through X across foundational sensitometric criteria. By comparing optical reflectance, Roman numeral designations, standard 8-bit digital sRGB values, and typical real-world physical textures, one gains an indispensable reference guide for field exposure calibration and raw tonal mastering.
Notice how the dynamic range bridges from absolute non-textured physical limits (Zones 0 and X) to the expressive textured core (Zones II through VIII). Maintaining this mental map in the field ensures that your exposures capture the full emotional and dynamic richness of every scene.
| Zone | Visual Character & Texture | Physical World Example | Digital 8-bit RGB | Print Density (FB) |
|---|---|---|---|---|
| Zone 0 | Pure Maximum Black; zero texture | Total darkness, black velvet in shadow | 0 – 15 | D-max (~2.20) |
| Zone II | Deepest textured shadow threshold | Dark wet soil, charred wood in shade | 40 – 55 | 1.60 – 1.75 |
| Zone III | Standard rich shadow detail | Dark foliage, weathered wood, dark stone | 65 – 85 | 1.25 – 1.40 |
| Zone V | Middle Gray (18% Reflectance) | Clear north sky, average weathered stone | 118 – 128 | 0.70 – 0.75 |
| Zone VII | Standard rich highlight detail | Sunlit snow, pale skin in light, white wall | 190 – 210 | 0.25 – 0.35 |
| Zone VIII | Highlight threshold; delicate separation | Glistening highlights, bright white paint | 220 – 235 | 0.10 – 0.15 |
| Zone X | Pure Paper Base White; total burnout | Direct light source, sun in frame | 250 – 255 | D-min (~0.04) |
Frequently Asked Questions About the Zone System and Dynamic Range
What is the fundamental difference between an incident meter and a spot meter?
An incident meter measures the light falling ON the subject from the light source and always calculates an 18% middle gray exposure. A spot meter measures the light reflected OFF a specific tiny point of the subject, allowing the photographer to manually assign that point to any desired zone.
Why do photographers say ‘expose for shadows, develop for highlights’?
In film photography, shadow density is established during early exposure; if not enough light hits the silver crystals, no chemical development can create detail. Highlights, however, continue to build silver density throughout the entire development cycle, so altering development time controls highlight contrast.
How does the Zone System apply to digital mirrorless cameras?
Digital sensors behave like slide film rather than negative film: they clip highlights harshly. Photographers use Zone principles via Expose to the Right (ETTR), metering the brightest highlight to place it just below the clipping point (Zone VIII.5) to capture maximum tonal data in the raw file.
Can I use the Zone System with 35mm roll film?
Yes, but with limitations. Because an entire 36-exposure roll must be developed for the same time, you cannot customize development for individual frames. Photographers solve this by carrying multiple camera bodies for different contrast conditions or exposing for Zone III shadows and controlling contrast in printing.
What is the difference between Zone V and Zone VII?
Zone V represents standard 18% middle gray (such as weathered gray wood or north sky). Zone VII is two full stops brighter, representing textured white surfaces like sunlit snow, white painted wood, or pale skin in bright sunlight.
What does N+1 and N-1 development mean?
N represents ‘Normal’ development. N+1 means extending chemical development time to expand a low-contrast scene by one stop. N-1 means reducing development time to compress a harsh, high-contrast scene by one stop.
Why does an in-camera histogram sometimes lie about blown highlights?
The camera histogram is calculated from an 8-bit JPEG preview with embedded picture profile contrast, not the raw sensor data. Raw files often contain 1 to 2 stops of additional highlight recovery headroom that the JPEG histogram incorrectly reports as clipped.
Which zone should I meter for human skin tones?
For Caucasian skin in soft sunlight, meter and place on Zone VI. For dark or tanned skin tones, place on Zone IV or Zone V. Always meter the skin directly and check whether it sits in direct sun or ambient shadow.
20. Beyond Technique: The Transcendent Art of Mastering Light
In our modern era of computational algorithms, auto-exposure automation, and generative AI image tools, photography is often reduced to a mindless technological reflex. We press a button, and silicon chips make thousands of aesthetic decisions on our behalf, averaging our unique visual perception into a homogenized middle gray.
The timeless gift of Ansel Adams’ Zone System is that it returns creative command to the human soul. By mastering the relationship between physical luminance, chemical sensitometry, and digital bit-depth, you transform the camera from a mechanical crutch into a transparent instrument of pure artistic expression. When you stand before a majestic mountain valley, point your spot meter, and place the shadows and highlights with deliberate, loving intention, you are not merely taking a photograph. You are participating in the sacred architecture of light, creating images of enduring power, beauty, and emotional truth.

